Showing posts with label rustic decor. Show all posts

Wednesday, April 30, 2014

Our Finished Shelves and a few Bookshelf Styling Tips

Big week for the blog... second post this week!  Woot woot :-)

Earlier this week I posted about the rustic shelving DIY project that I worked on, and today I wanted to share some photos of the completed project, now that the shelves have been styled.


I am certainly no expert on styling bookshelves, but I did learn a few things as I went - especially after several failed attempts at styling them.  They were looking messy.  Cluttered.  And I was frustrated because I loved them with nothing on them, and was hating them with all our stuff.

The challenge for me, is that these shelves are not just for display.  They actually needed to be practical (ugh, I hate practical) and store things - mainly books and magazines.  It's not like we have a ton of books since I have done most of my reading on a Kindle for the last several years, but we do have SOME, and I'm not willing to part with most of them.


All my design books, which happen to be big and beautiful and perfect for styling a bookshelf are all in the living room for easy grabbing.  I like to leaf through them on weekends or at night when we're watching TV, so those weren't going on the bookshelf.  

All my cookbooks that are also large and gorgeous are in the kitchen for obvious reasons.  So that left me with only a few hardcovers, and a lot of paperbacks.  Not ideal for "beautiful" styling, but that's what needed a home, and we live in the real world... not the pages of House Beautiful... unfortunately.

Ignore the radiator... looking at these photos makes me realize how badly that needs to be sanded and re-painted...

All the shelves I loved on Pinterest and in design magazines weren't necessarily functional... they housed gigantic seashells, and cool candlesticks... driftwood... cloches with cool weird stuff inside.  Not helpful.

So per usual, I turned to Google. 

"How to Style Shelves".

Search.


OODLES of results came up, and I recognized a few of my favorite bloggers among the results. Little Green Notebook. Censational Girl. Emily Henderson.  Queen of bookshelf styling.  Seriously.  She wins.

After reading all the tutorials, there were a few key points that stood out. As I worked at re-styling the shelves, these tips REALLY helped me put together an arrangement that I was satisfied with in the end...

Here are the tips I found most helpful as a guide:


Start out with the largest pieces and then add the smaller.

By arranging the large pieces first, and filling in sparse space after, the end result was more balanced, although even looking at these pictures I see a few things I'd like to change.

Group like with like.

I kept photos together, books together, and small decorative items together.  In my first attempts, everything was too scattered, and there was no place to rest your eyes.  There were books on every shelf, photos on every shelf, and it ended up feeling really busy.

By grouping things together, it instantly "makes more sense" when looking at it - especially keeping the books together... which brings me to my next super helpful tip...


When organizing books, group by color.

Game.  Changer.


I started sorting books by color category and quickly realized that with the exception of maybe 4 or 5 books (that as a result aren't on the bookshelf), everything fell into the following color palates:
   - white / neutrals
   - blue / teal
   - yellow / gold
   - black

Grouping by color is not only pretty, but also cleans up the chaos of the book spines when they're all lined up


While on the topic of arranging books, alternate books by stacking them vertically AND arranging them in rows.

This will also help to make everything more visually appealing.  Apparently (and this was news to me)  there are seven... yes SEVEN... ways to stack books.  If you're curious like me, you can read about them all here.


With the big objects in place, and the books stacked by color, it was time for the decorative items...

I think I may be the only person on the planet that cannot keep succulents alive.  These are fake.  BUT they look real... which is what matters (don't judge me).


I liked the varied heights, and the varied textures of the glass, concrete, and terracotta, and I thought it all looked really pretty against the greyed out wood.


The wire basket on the top shelf just looked cool to me, and I like the rose gold color.

It's actually a fruit basket, but it felt really sculptural, and I like it.  So it's on the bookshelf now instead of in the kitchen.  Just thinking outside the box a little...


Another tip I read was to anchor the shelves with a collection on the top... I don't have any collections of lovely milk glass, ginger jars, antique vases, African masks, or all the classically beautiful and cool things you see on styled shelves, but I felt that a few large frames staggered would do the trick.

They add height, and in a way sort of anchor all the shelves below.


Plus I just like them...

Finally, one of my favorite tips - use baskets as a catch-all.

We have magazines for days, and I like to save a lot of them for inspiration to come back to.  These baskets are perfect for collecting them, without having a million magazines on the coffee table.

This tip is actually a good rule of thumb in general - we have baskets all over the house - in the living room to corral blankets and throws, in the kitchen for spices, and rarely used gadgets.  They hide clutter beautifully, and bring together the best of both worlds - function and aesthetics.


I also think that having fewer visible "things" on the lower shelves serve the same purpose as having a collection (or in my case, picture frames) on the top of the shelf - it anchors everything, while letting the books organized by color, and the pretty decorative items shine.


So that's it!

What do you think?


I do not pretend to be an expert on this topic, so if you're curious about my favorite articles on the topic of bookshelf styling, here they are:
     Emily Henderson: Living Room Styling (there aren't a ton of tips, but good photos)
     Emily Henderson: Tips to Bookshelf styling (this one is gold)
     The Lovely Cupboard: How to Style a Bookshelf (I really liked this one too)

A few of these pictures give you a sneak peek into the progress of our dining room - and I can promise you that while it's still a work in progress, there are more pictures coming your way soon.

Happy Wednesday!!

Monday, April 28, 2014

Rustic Wood Shelf DIY

Our dining room has new shelves!!  They are a little rustic... a little glam... and totally perfect!  I'm SO THRILLED with how they came out!


Just look at them!!  So pretty right??


I spent the better part of Saturday afternoon, with my drill, level, and measuring tape, hanging these bad boys up.

These shelves are a DIY I'd started a few months back, and then they got totally neglected out of sheer laziness.  They'd been sitting in our garage for about a month after I stained the wood, and then sitting against the wall in our dining room for another few weeks before I finally decided to do something about them.

I don't know what came over me this weekend, but I was on a mission to finish unpacking, and with several boxes of books staring me in the face, I knew it was time to get these shelves installed.

Originally, I'd been envisioning a lovely rustic bookcase like this or this, but in the end I didn't feel like I could commit spending that much on a bookshelf I wasn't 100% sure I wanted, so shelves were the best option for me.  One thing I knew I wanted was for them to be made of wood - we have too much painted furniture in the house right now, and bringing in an organic material like wood or natural fibers (our Jute Rugs... the linen curtains... etc) makes such a difference!


Do you want to know how much I ended up spending on these shelves??

Next to nothing!!

Each bracket was $2 and each shelf was $15.  I bought eight white brackets, and four untreated raw pine shelves from Ikea, for a whopping $76.  Pretty sweet, right??

In all honesty, I can't take credit for coming up with this Ikea hack on my own - I totally copied the shelves that Sarah over at Smitten Studio had DIY'd and installed.  I found her blog through an image of these shelves on Pinterest, and I was smitten.  Pun intended.

Imitation is the sincerest form of flattery... right??

While I loved the reddish color of the wood she used, I wanted something a little more weathered in our dining room - a little "Restoration Hardware" inspired since greyed out weathered wood is their thang, and I think it pairs really well with the grey linen curtains in there.  A little beachy... a little less formal.  It's a match made in heaven.

Anyway, the DIY was super SUPER simple...


Materials you'll need before starting:
  - Unstained wood shelves (mine were pine - same ones listed here)
  - Wood Conditioner (I used Minwax, pre-stain wood conditioner)
  - Stain (I used Minwax Classic Grey)
  - Foam Brush
  - Rag
  - Brackets (I used these)
  - Rusoleum Metallic Gold Spray Paint - it's my favorite gold
  - Brass Screws


I had never stained wood before but it could not be simpler - when you've got all your supplies gathered, coat each board with the pre-stain wood conditioner.  I'd read about using wood conditioner on One House Love, and was sold.  More even application, and more uniform color?  For $7?  What do I have to lose?

I can't speak to how much better it was than untreated wood, but it worked great for me, so I think it's worth the extra 5 minutes it takes.

Anyway, just apply the conditioner with your foam brush, and wait for it to soak in for a minute.  By the time you finish the last board, the first is ready for stain, so there isn't any down time.

On to the stain - feel free to use the same brush that you used to apply the wood conditioner to apply the stain, and brush it on in long, even strokes in the same direction as the wood grain.  Do NOT brush against the grain.  As long as you go with the wood grain, this process is foolproof.

Once you get one coat of stain on the wood, immediately wipe it down.  You can re-stain as many times as you like to build up color over time, but this way you'll have more control over how much of the stain takes to the wood, so each board is uniform.


I found that even with the conditioner, the wood soaked up a lot of the stain quickly, so be ready with the rag to wipe it down.  Fearing that I'd stain them too dark, I did one coat and waited to see if it would need another the next day... thankfully they didn't, so I stopped after one coat.

As I got started applying the stain, I was a little nervous about whether or not it would turn out - when I was first applying it, it was looking awfully purple.  The raw untreated pine has a bit of a "pink" quality to it, and the stain initially looks very purple - parts were blue, and the undertone of the wood was showing through, but fear not - as it dries, the colors meld together, and it will turn out nice and greyed out like below.

You'd never know this wasn't an old reclaimed piece of wood now that's dry and cured.


My father will kill me if I don't add this bit in - once you're finished staining the wood, DO NOT throw your rags and brushes in the trash.  The chemicals generate heat which could catch fire if not allowed to dry out - lay them flat in open air to dry completely before throwing everything away.  No one wants to start an unintentional fire.

Anyway, as the stained wood was dying, I laid out all the brackets and sprayed them gold.

Simple.

Once everything is fully dry (I'd give it a full 24 hours for the spray paint to cure) everything should be ready to be hung.

Since the wall brackets screw into the wall, I wanted the screws to be as incognito as possible.  You could spray regular screws gold, but I went the easy route and bought brass screws from the hardware store.  They are more expensive than normal screws (about $0.55 per screw) but worth the time I saved and the finished look.


The DIY was the easy part, getting them hung was the most time consuming!

When hanging shelves (or art, or anything really) measure very carefully, and mark out your holes before drilling or hammering anything.  That way you'll end up with fewer holes in the wall.  Also, a straight edge and a level are your best friends.  There is nothing worse than crooked shelving.

Anyway, I'm thrilled with how this all came together.  Even though this project cost me next to nothing, they look really expensive, and even though all the pieces came from Ikea, they feel really unique because I was able to put my own spin on them.


I have another post coming your way later this week with these gorgeous shelves all styled up, but that's a whole separate post.

It was a lot harder than I thought it would be!  It was also a little painful to cover up my beautiful shelves with books and pictures, because I was loving the simplicity of how they looked on their own. After a few failed attempts to style the shelves, I did a little researching around "how to properly style shelves" and while they aren't perfect, I have a few pointers I picked up that really helped me out in the "styling" department.

Happy Monday!

Wednesday, July 24, 2013

Rustic Bookshelves

Sorry for the lag time on the dining-room-turned-office update photos... that room has not gotten any of the other promised updates since I posted about my beloved fiddle leaf fig (which by the way, is absolutely THRIVING so far knock-on-wood).

The original plan was to hang shelves for book storage on the walls flanking the entrance to the living room... three on the left wall, and two on the right wall so there would be room underneath for a nice comfy chair to read in... here's how we I envisioned it working out...

Since painting, and rearranging some of the furniture, I hung one of the shelves, but after getting it up, I wasn't convinced that I LOVED it... so I waited a week to see if I wanted to hang the rest, or if I wanted to switch up the plan.

The good news is, I do like it, so I want to hang the rest of the shelves...

The bad news is, I do not trust our plaster walls to support a heavy load.  After hanging the first one, I'm having visions of these shelves coming crashing down in the middle of the night after the plaster crumbles from the weight of our books... no bueno.

I wanted these shelves to function as a bookshelf, but I just don't see that happening now... I am so sick of staring at the cardboard boxes in our living room full of the books that used to be in the dining room (not a good look by the way) so I want to find somewhere to store them... stat.

What I need is a bookshelf... a small, pretty, but functional bookshelf, that can go along this wall in our living room...

Let's pretend that this photo wasn't taken right after I dumped all my treasures from Ikea, and that it's not a complete mess... sadly the console table still looks like that - books galore.

I plan to sell that console table (which really is a shame since I love it even more after painting it white recently (remember when it was blue and in our hallway??) It's come a long way since then...

Anyway, back to the bookshelf for this space.  I want it to be about four feet wide, and about three feet tall, and I really want something with an aged wood look...


Something like the Copenhagen Bookshelf from West Elm would be perfect... if it weren't like 7 feet tall. Simple clean lines, and that gorgeous wood... if only it had a little brother bookshelf!  Back to the drawing board...


The Emerson Bookshelf from World Market is also along the lines of what I'm looking for... although again, too dang tall!  Sooo frustrating!

But then... hello... what do we have here??

Overstock to the rescue?  This one is actually a TV stand, but it could actually work!!

It's 2.5 feet high, by almost exactly 4 feet long... I'm not loving the turned detail on the metal legs... I wish they were a bit more simple, and a few bad reviews always get me nervous, but this could be a serious contender...

I need to make a few more measurements to see if this size will fit, and do a bit more digging of course to be sure this will work in our living room...

What do we think?

Tuesday, June 18, 2013

Industrial Shelving

Industrial... rustic... found... restored... upcycled... these are all SUPER common words thrown around in design magazines, shows, and blogs... and a spreading trend supported by hugely popular retailers like West Elm and Restoration Hardware. I'm not a fan of everything "industrial", but used with restraint, these pieces add a lot of character, and help balance out a room, keeping it from looking to perfect and shiny.

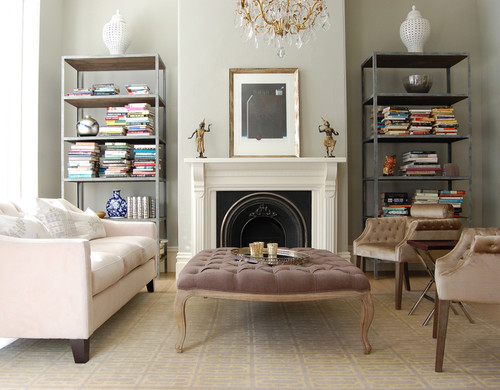
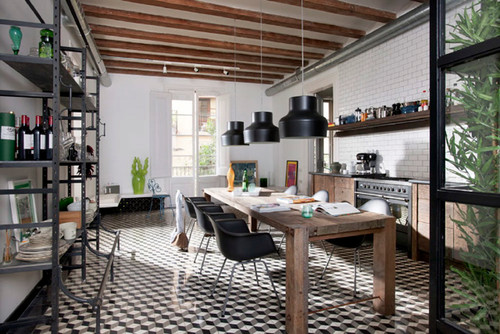
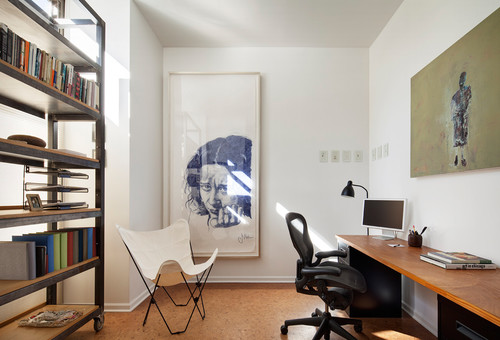
As I think about our pending move, and as we get rid of our "early twenties single furniture" and fill our house with things that reflect BOTH of our tastes and personalities, I'd love to find a few ways to incorporate some pieces with a bit more of an industrial feeling to them.  These photos provide ample inspiration for the look I'm going for... clean and classic, with a bit of industrial chic...


As trends come and go, I think I'd most want to test this trend through a piece that isn't a staple to our house.  Some sort of shelving unit seems like a safe bet, because it will be large enough to make a statement, but we won't feel TOO tied to it the same way we would with an "investment piece" like a bed or dining room table.

I did a little digging to see what I could find online, and it turns out that there are a TON of cool shelving units that are very reasonable.  My best sources??  Home Depot, Lowes, and Ikea.  These aren't even all the shelving units I found either - just my favorites...

1  , 2
 3  ,  4
5  ,  6

These shelving units, range in price from $15 (yes... $15!!!!) to $130.

The most expensive was the wooden Ivar Unit (#4) from Ikea at $128 (luckily for me, this is my least favorite of the bunch), and the least expensive shelf was $6 from Ikea... and it cost just $15.

I literally cannot get over it!  I am dying to see what it looks like in person - is it rickity?  Does it look cheap or totally awesome?? It's only 10" deep, so it wouldn't stick out too far into a room, and I think it would look kind of cool to line up four of them along a wall for open storage.  I also like that there is A LOT of space between each shelf - nearly 20" if I'm doing my math correct, so things wouldn't feel cramped.

I mocked it up really quick... kind of awesome, right??


... and it would only be $60 for 4 of these shelving units!  I also like #3 a lot, and those are just $30 each from Home Depot!

Another mock up... more cramped, but also a lot more storage??  Also... it looks a more sturdy with the X's on the back for support... no?

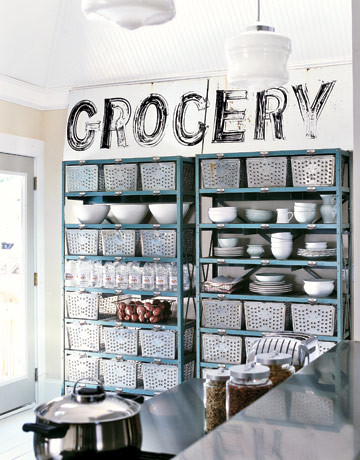
#2 would look cool in a kitchen, holding colorful mixing bowls, pretty new pots, and cook books... along with large glass jars of flower, sugar, oatmeal, and other bulk foods.

#1 is also at the top of my favorites... and while the frame looks really sturdy, I think the black might be too dark considering I'm trying to stay away from too much more black in our house...

On the "less industrial end" I am IN LOVE with #5 - the Vittsjo shelving unit, and with a quick coat of gold spray paint, it could soon be just like one of these...


Not at all industrial, but still a shelving look that I'm obsessed with... ALTHOUGH I'm not hating the black at all... it might also look amazing with a rubbed bronze finish??

After tracking down some great industrial shelving options, and seeing how inexpensive they all are, the little wheels in my head have started turning...

Perhaps you'll be seeing more on this topic soon...

Monday, May 6, 2013

Rustic Coffee Table

I've decided that our living room needs some more "natural" elements.

The annual Restoration Catalogs may have helped sway me in this direction, but I've realized that pretty much all our furniture is painted, or made of man-made materials.  Obviously, a huge reason for this is because I've been making the most of what we have, and slapping paint on anything I can to extend it's life in our apartment, but the main reason we have all this faux-material furniture is because I was on a TIGHT budget when buying furniture the first time around.   Particle board was my best friend.

Not anymore... we need some rustic up in herreeee!

These bad boys started this whole thing!!!


I've been toying with the idea of a little DIY on our coffee table to take it from this... shiny and really dark...


To something more like this...
Or this... (even though this is a dining table... you get the idea)


I even toyed with the idea of painting it white, and getting a plate glass top to protect the paint on top (something like the below photo).  The glass would be essential here since it gets A LOT of wear and tear, and I suspect paint wouldn't stick so well to that slick surface.


But then, the point here is to get more rustic going on, and less painted furniture.... so I was back to the idea of using reclaimed wood (or at least wood that LOOKED reclaimed).

I had been thinking of getting some fresh boards from Home Depot, banging them up, and then applying this "aging treatment" that I read about here to oxidize the wood with vinegar and steel wool.  Will it work?  I've heard mixed reviews, but supposedly it takes brand new looking wood and gives it the weathered, greyed out look... ultimately, I'd be nailing these boards to the table top, and painting the base white, or a lighter neutral color...

I've been toying with this idea for a few weeks, but then today, I saw this table on World Market's site, and it got me thinking....


The Cameron Coffee table is $229, and I currently have a 25% off coupon that would make it $172. Things just got interesting... While I haven't totally ditched the idea of trying my hand at adding an aged wood top to our existing table, simply buying this new coffee table will be way easier (obviously), and possibly cheaper.  In the event that in the event that this DIY completely flops, I'll need to get a new table anyway!

Here are a few few pictures from the glowing reviews on World Market's site, that people posted of the table in their homes!


Cute right?  Rustic, natural wood, and apparently quite sturdy... Lots to think about!  Just need to make sure it's not too small - I like a good sized coffee table.

I also saw this weathered leather chair...


There is something about it that I love - obviously the nailhead, but I also really like the mottled looking leather, and low back.  And as you know, I've been looking for a reason to get rid of the wicker chair that DOES NOT belong in the living room... I may have just found my reason.

I'd love to see this in person - sit in it, see how comfortable it is... I want a deep seat!  Something to lounge in with my coffee on Saturday mornings.

Very excited about my potential new living room finds!